
|
|
|
|
By Editor Fernando Coelho
Edited and published by Yvette depaepe, the 18th of March 2026
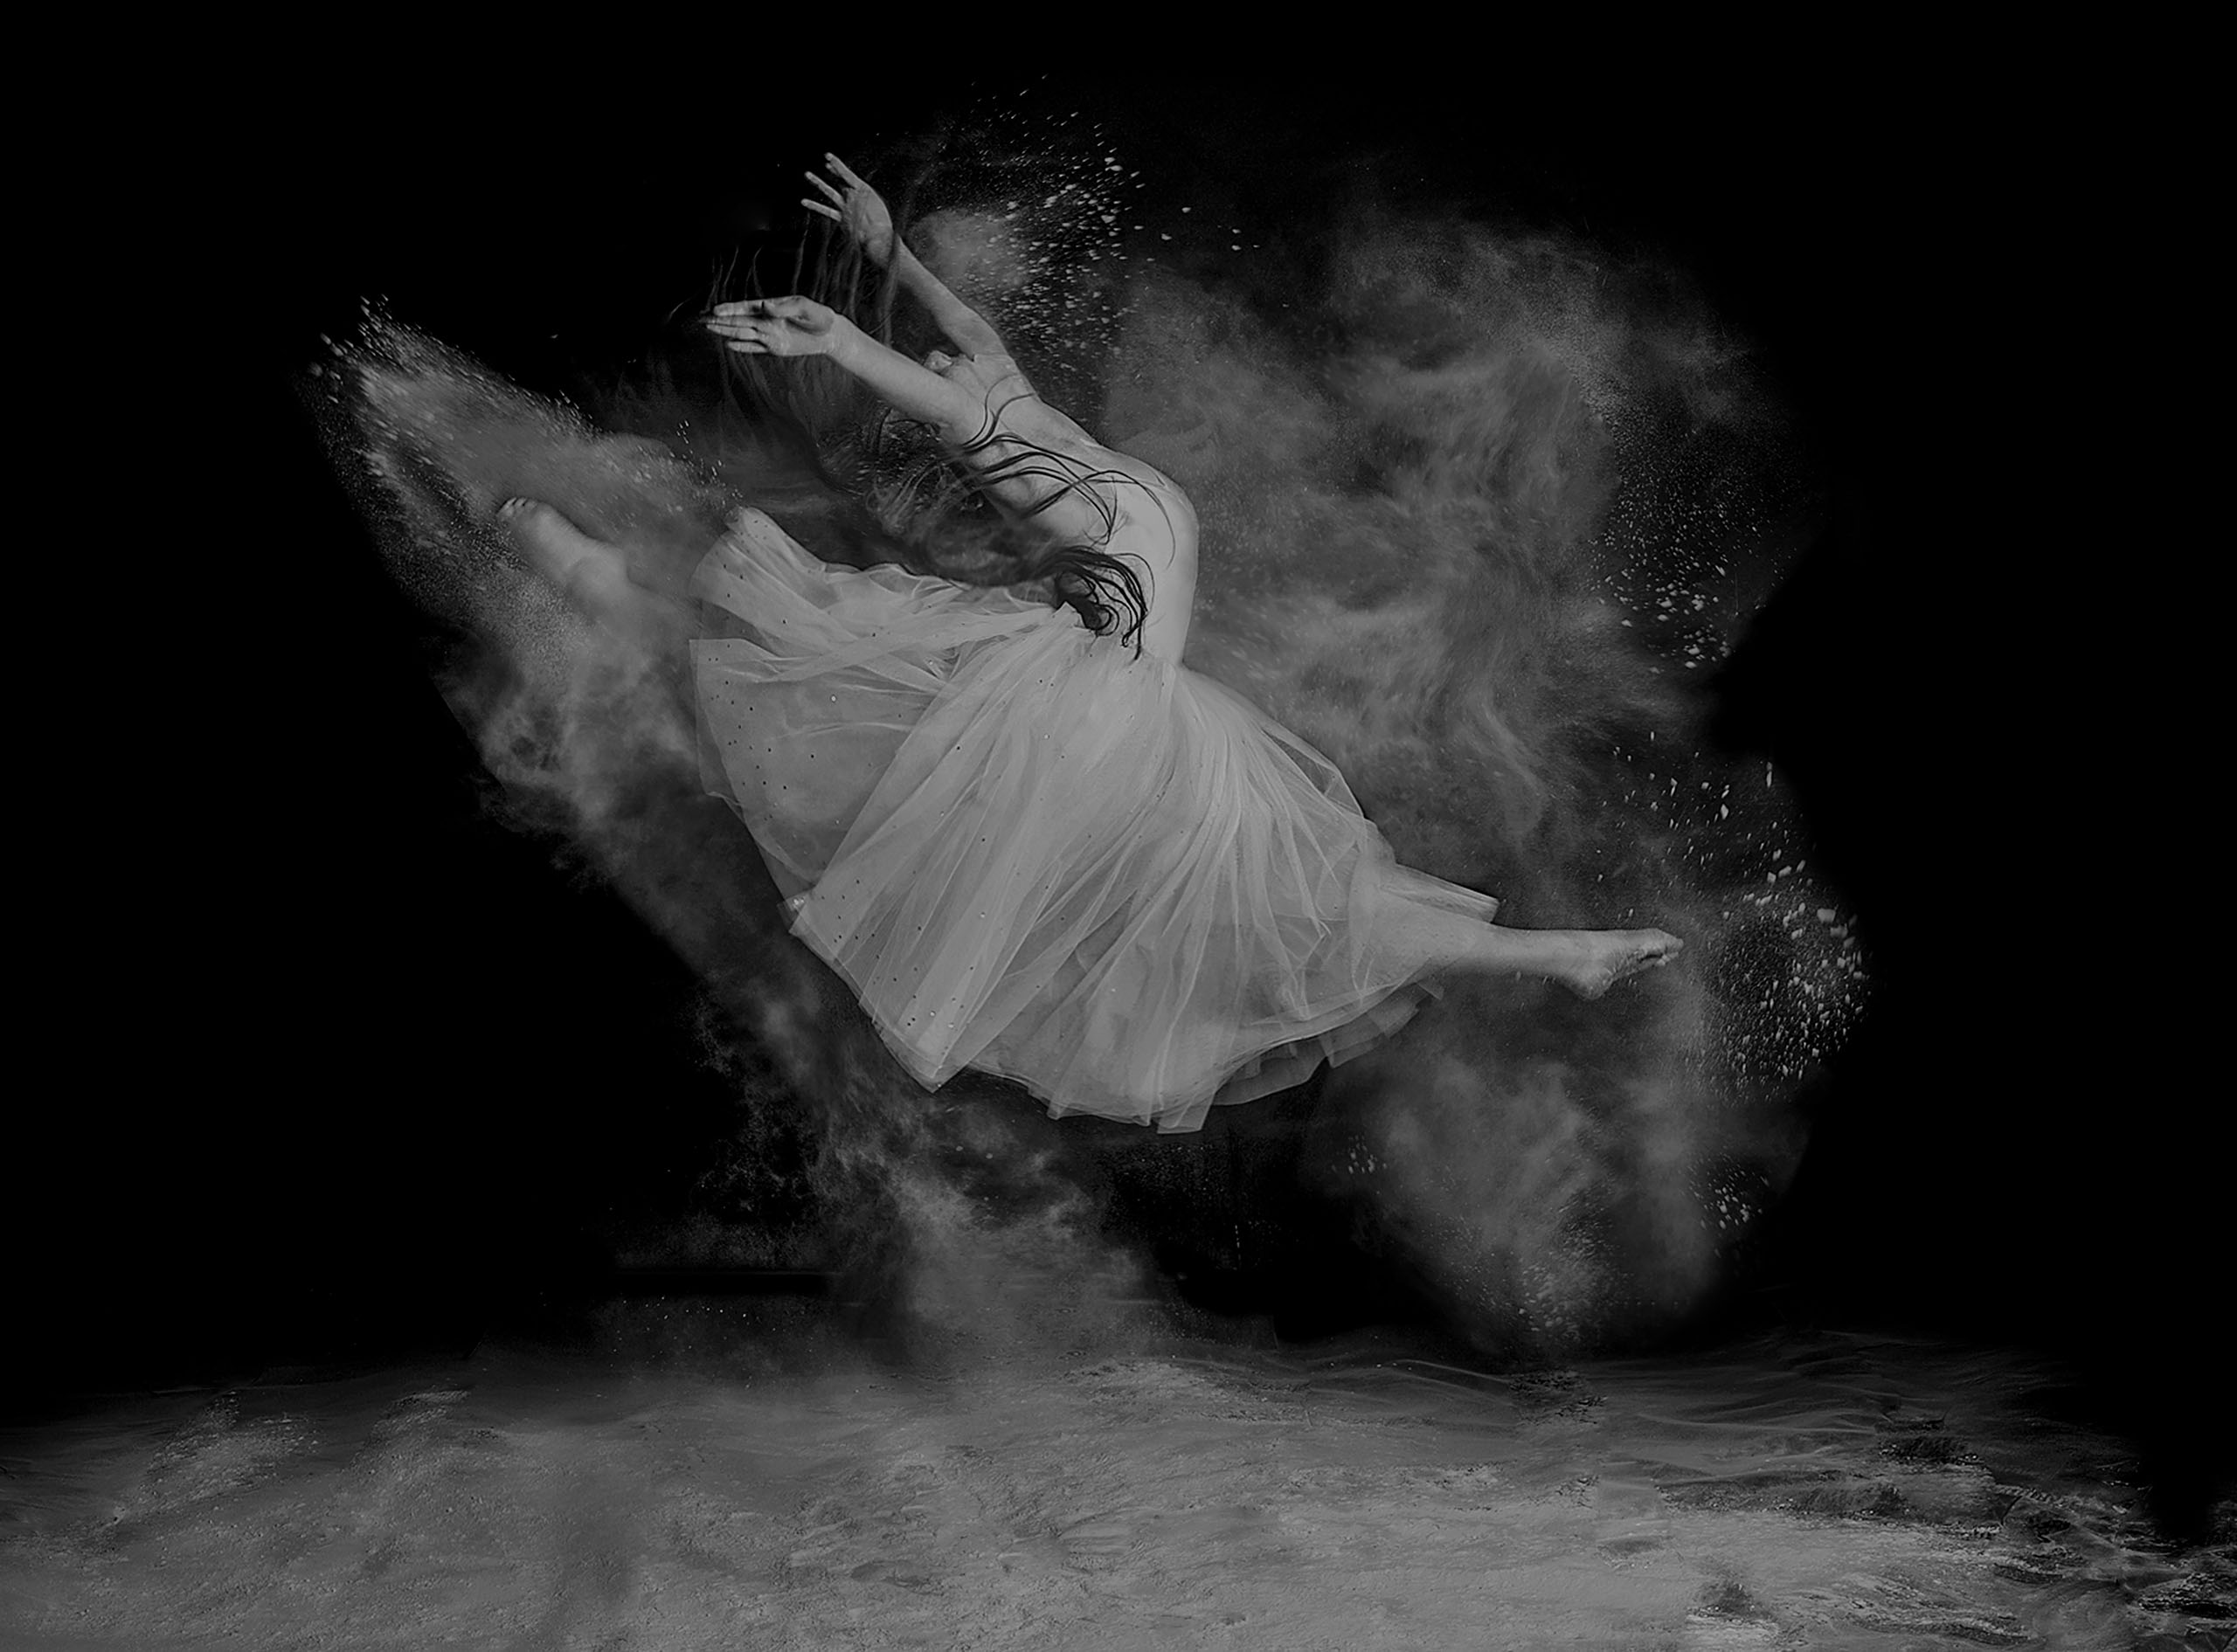
BEYOND THE BASICS IN STREET PHOTOGRAPHY
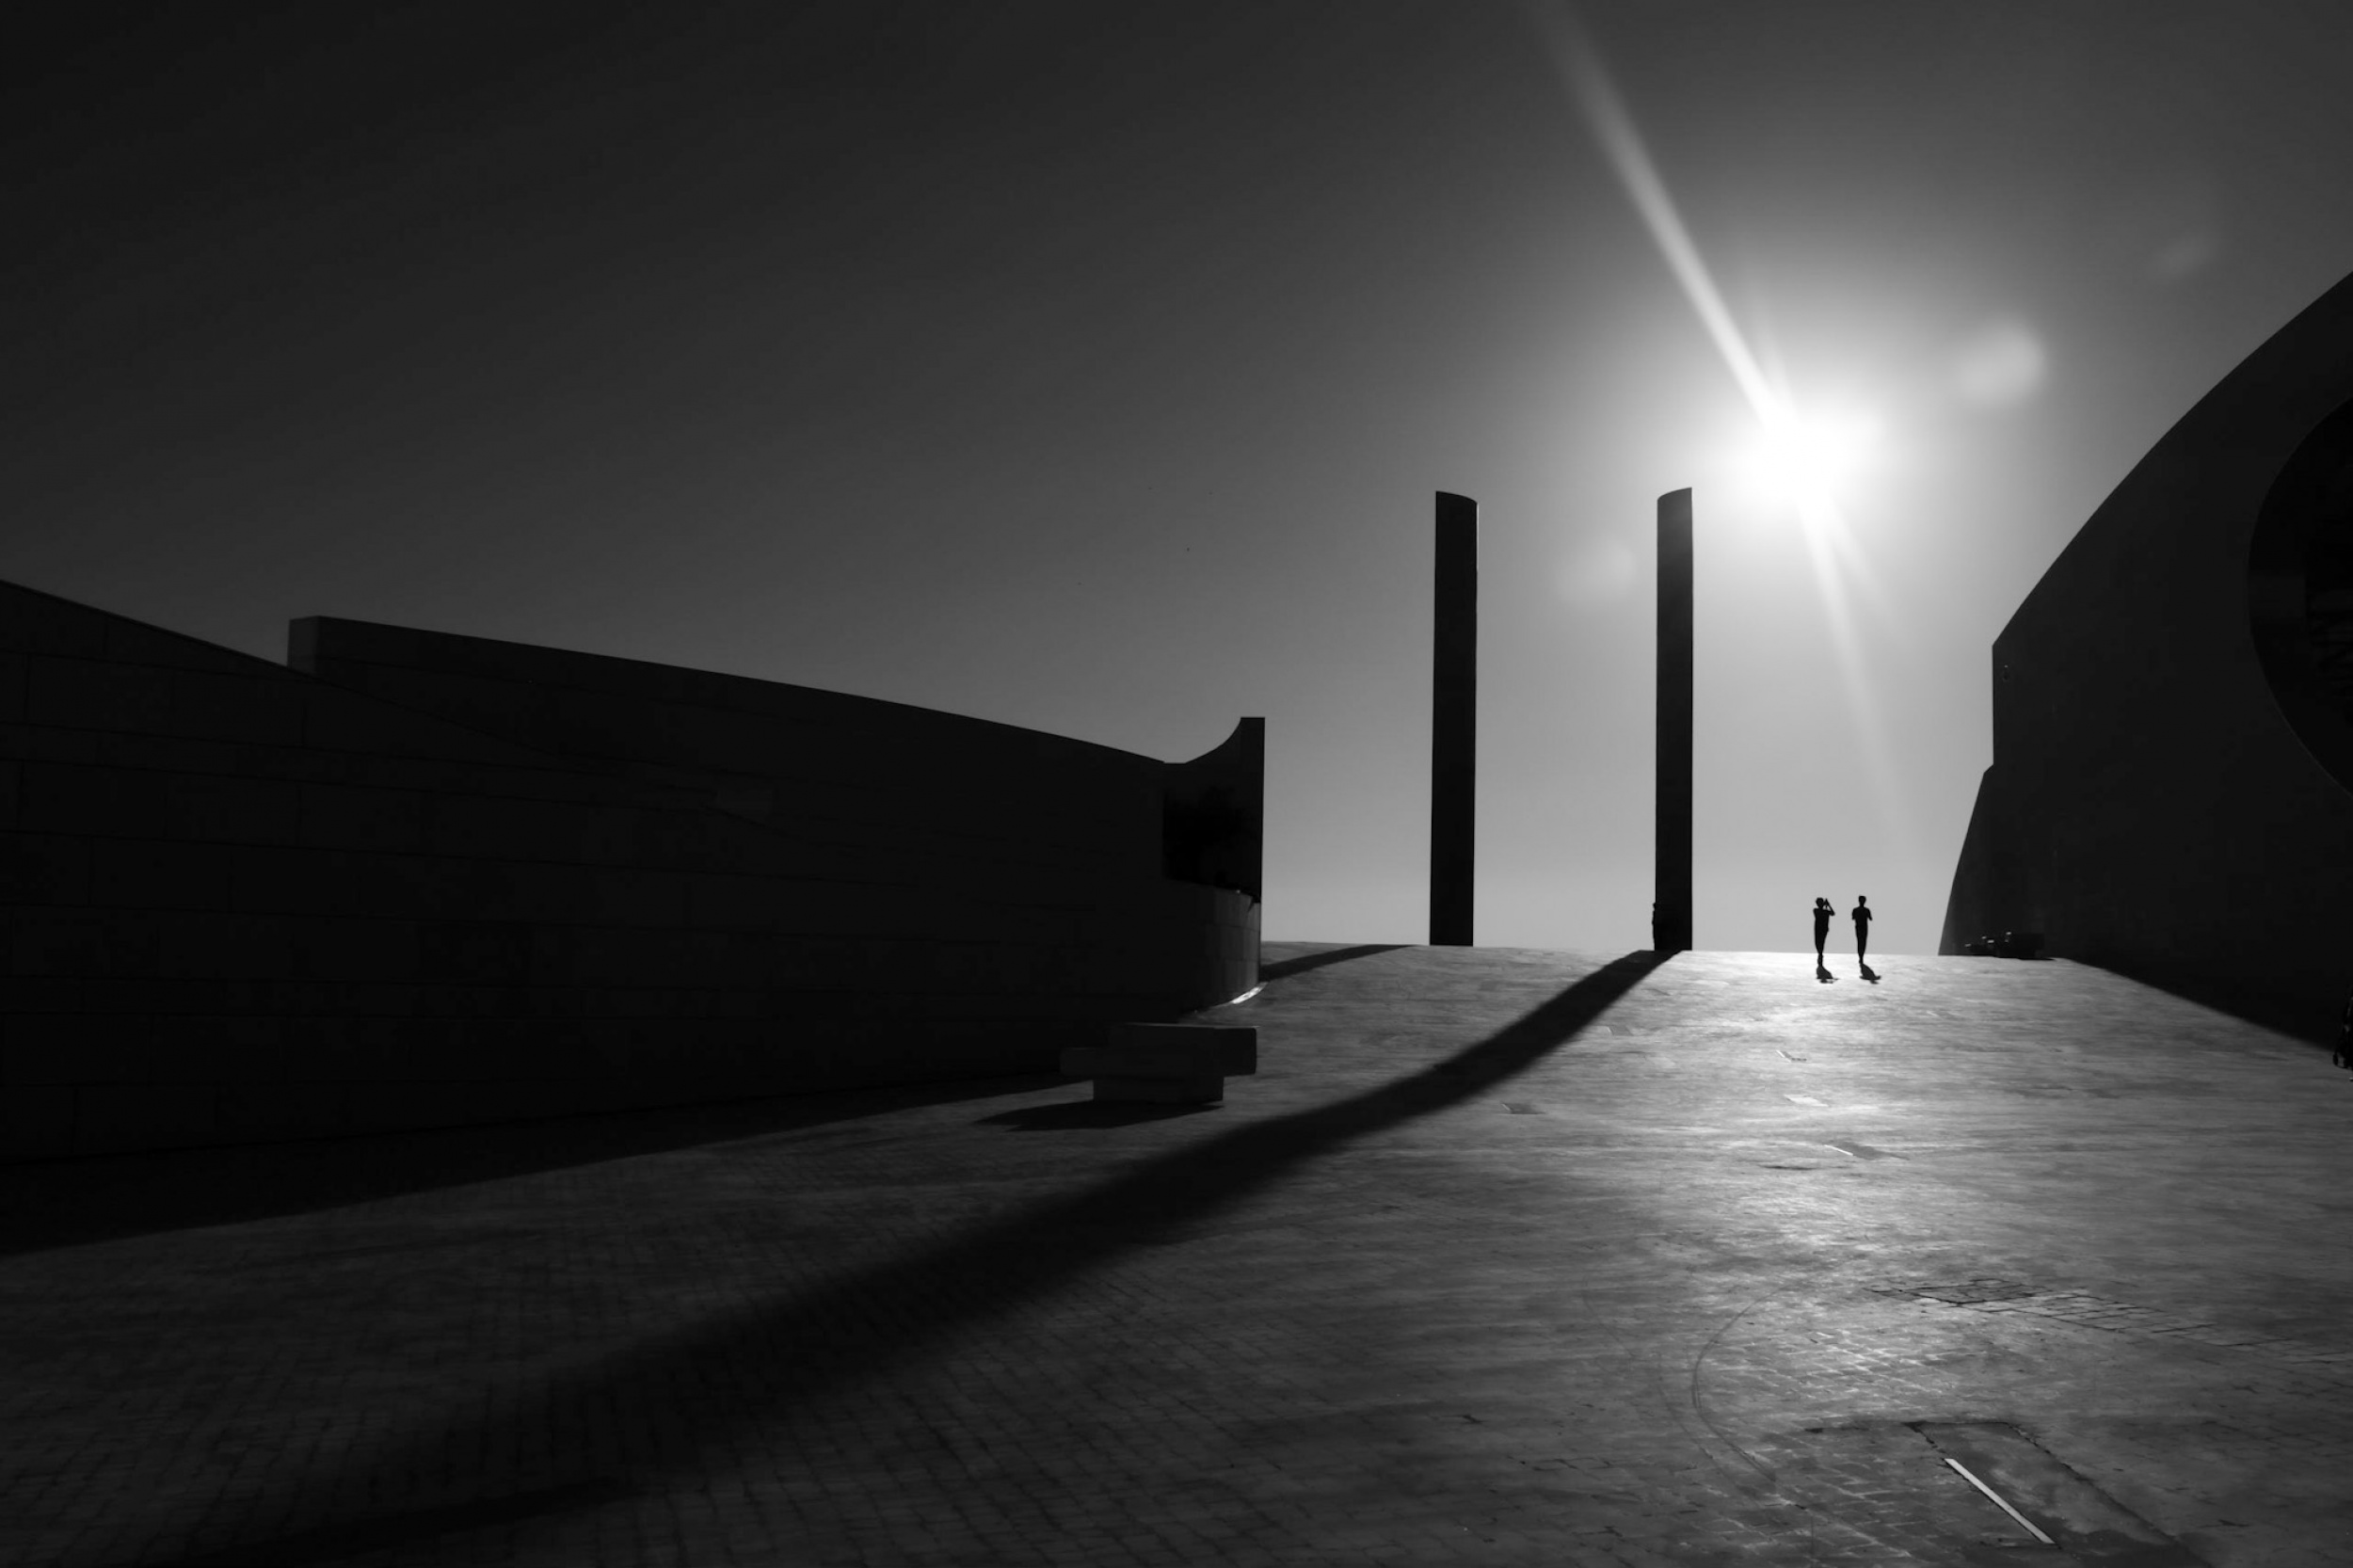
“Ritual”, Lisbon (PT) — by Fernando Coelho
In the first story of this series, I showed examples of how you can tilt your horizons.
The second story focuses on diving into the chaos we live in without losing our balance.
And, how to use it to enhance the stories you want to tell with your street photography.
This is the last story of this series.
It is about squinting your eyes against the sun and shaking some norms.
Give your camera a good rattle (or Avoid Camera Shake)
You have worked to capture that one moment that won’t repeat, only to find out later that a camera shake has made your shot blurry. This is even more unnerving if you don’t notice the blur until after you download your photos onto your laptop.
“Escapade”, Glasgow (UK) — by Fernando Coelho
This is an excellent example of how to ruin the capture of a cool blip in the normality.
Camera shake is also a common occurrence with longer exposures.
An in-built image camera image stabilization can rescue you, as can a tripod.
To a certain extent, you can also use the exposure triangle to set a suitable combination of ISO and aperture that allows the appropriate exposure when increasing the shutter speed to avoid blurriness. If avoiding it is what you want to achieve.
There are numerous ways to harness the artistic potential of your camera, even in situations that might seem challenging.
For instance, you can create compelling compositions by combining a long exposure with an intentional camera shake. So, don’t dismiss the idea of camera movement just yet. It could be a key to expanding your horizons in street photography.
A classic example is panning shoots to create arresting photographs. For this type of shot to work, you must make a smooth panning motion from side to side, following the object you are shooting. Cars, bicyclists, and runners are common panning subjects. You can find an illustrative story about this technique here on Medium.
Rotating the camera half-circle while the shutter is open to create a circular motion that matches the subject’s path is also enormous fun. It gives the viewer of the photograph a more immersive experience.
I gave some examples in this story. I leave you with another one below.
“Swirl”, Rotterdam (NL) — by Fernando Coelho
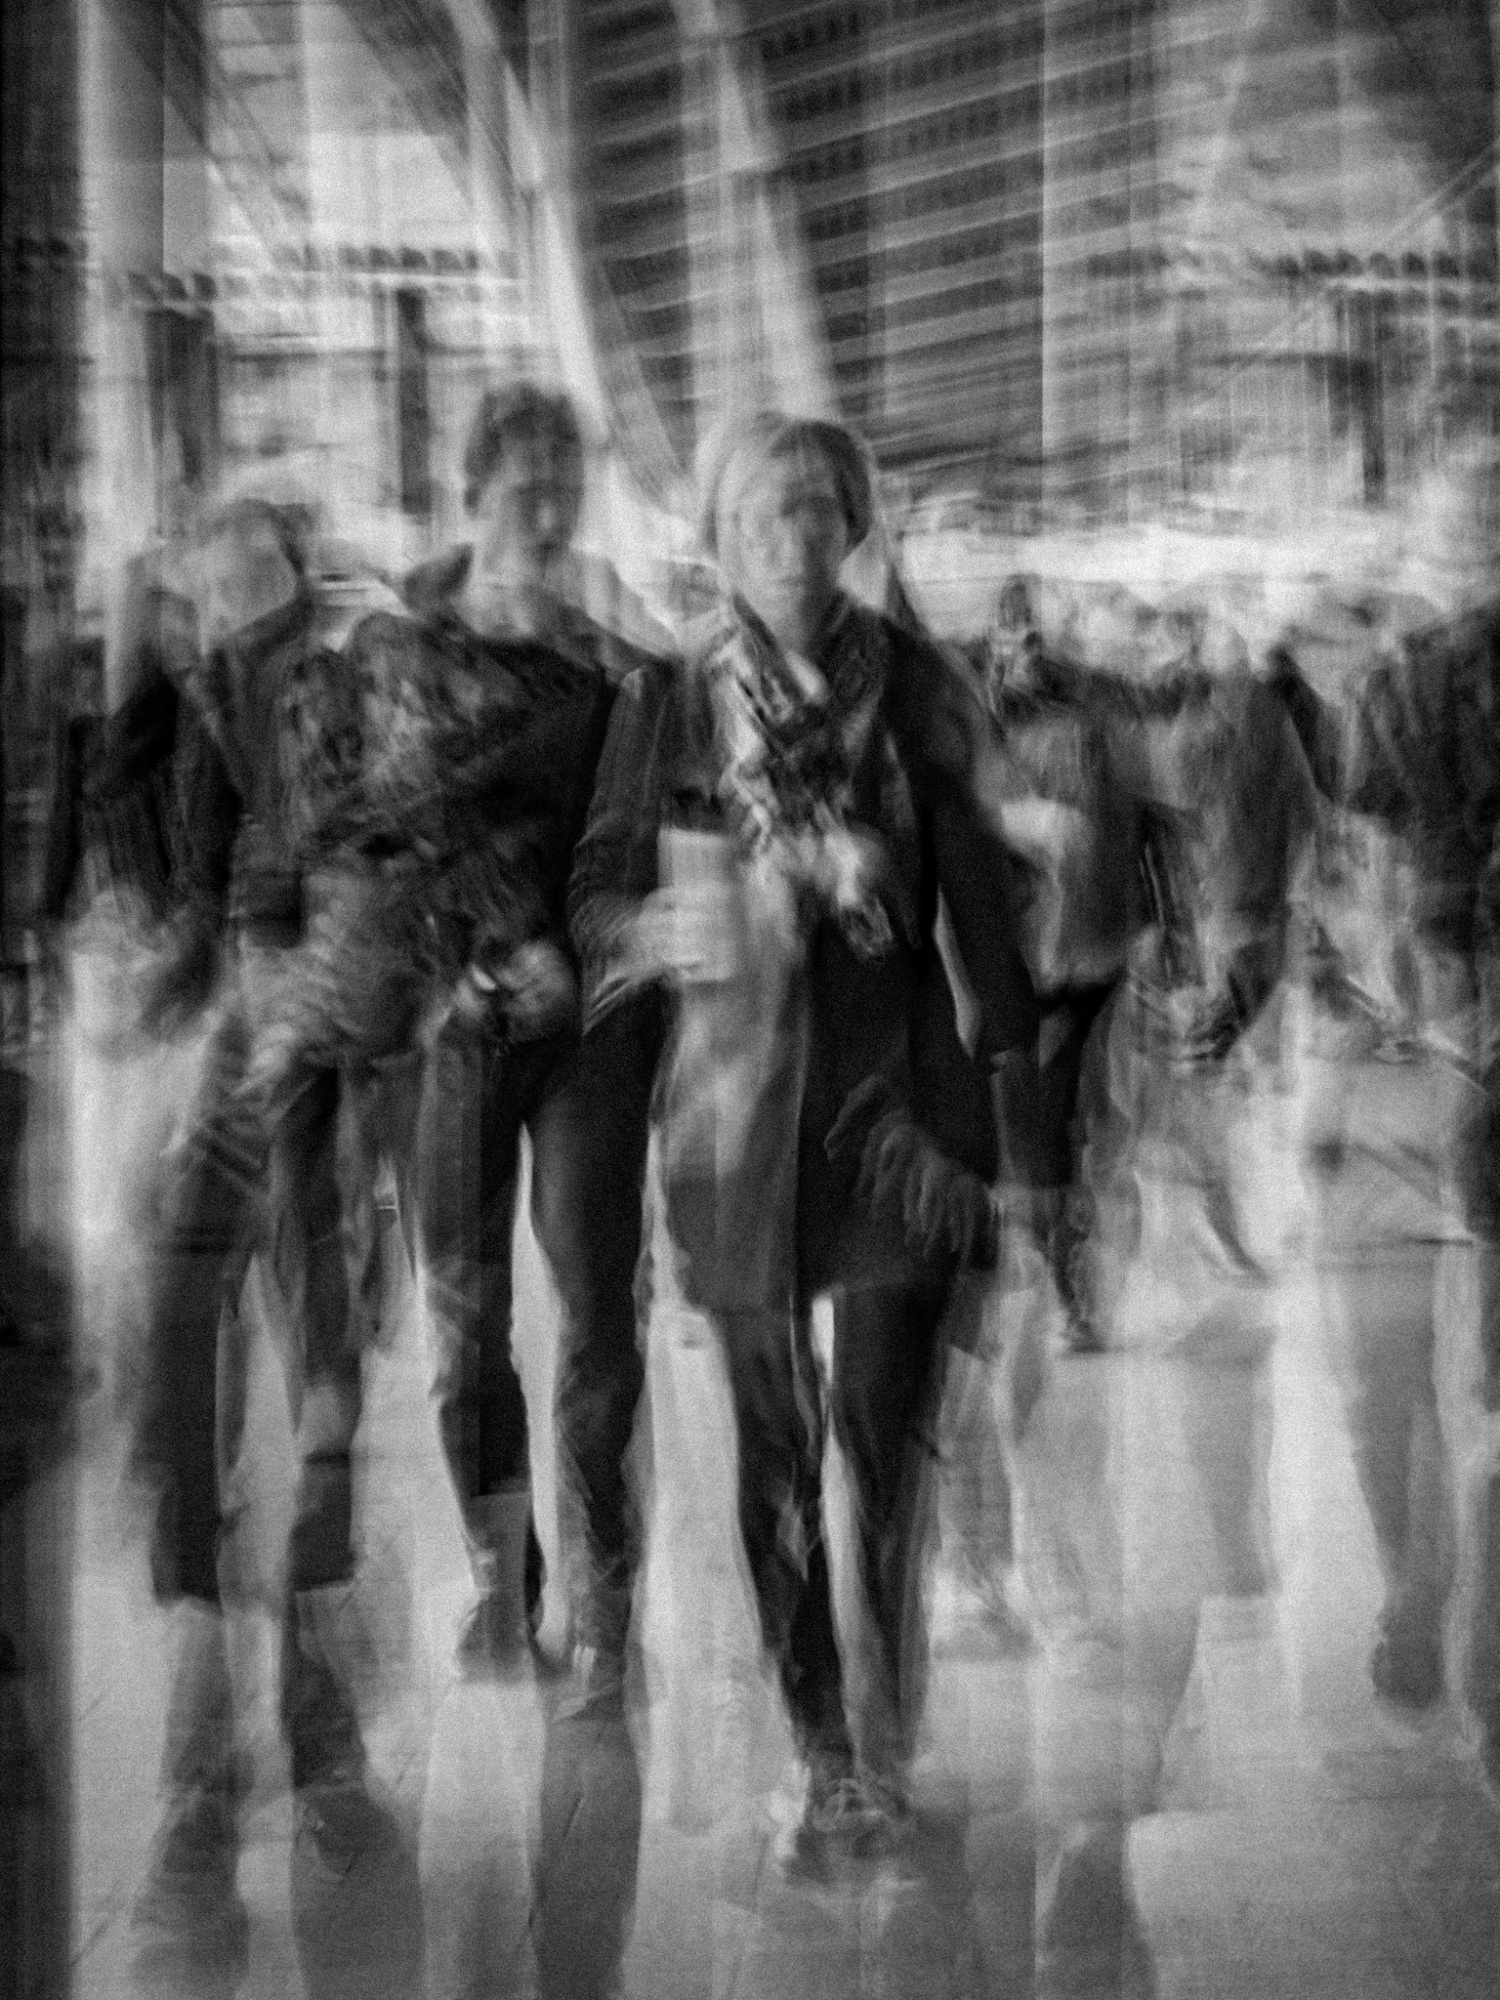
You can go a step further and shake the moment more vigorously.
People in motion will start to vanish and travel to a twilight zone. They would appear unsettled and confused about why they are kept in the same loop every day.
With that idea in mind, I was convinced that I could create a visual story out of thin air.
I walked against the flow of commuters in the Utrecht Central Station.
The Fuji X100F just above waist level. Shutter speed at 1 sec. The smallest aperture I could get, at f/16. And, very importantly, the built-in Neutral Density (ND) filter activated to avoid excessive exposure.
You must experiment extensively.
by Fernando Coelho
 by Fernando Coelho
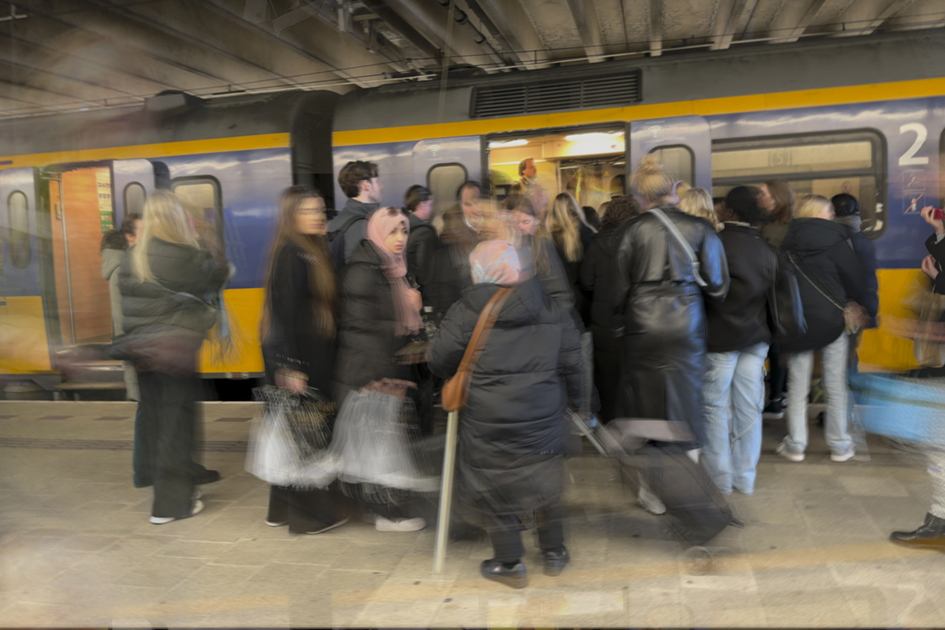
by Fernando Coelho
It is all about shaking the camera up and down while the shutter is open for 1 sec. Several times until you get what you want to make public.
Let it Flow (or Freeze motion with fast shutter speeds)
Freeze! That’s what you may be thinking when taking photographs of moving subjects.
How fast does a shutter speed need to be to freeze motion?
The answer depends on several factors, including how fast the subject moves and where it moves from/to.
By freezing the shot, you can keep everything in focus so the elements of the shot describe what is happening.
Freezing movement allows the viewer to get a clear picture of what is happening in your frame — whether it’s playing basketball, running, or walking.
Like walking down the street and getting caught by a naughty subway ventilator in downtown Lisbon 😬.
“Marilyn Monroe”, Lisbon (PT) — Photo by the Author
Motion freeze can also create exciting compositions — particularly when water is involved. Splashing water, waves, sprinklers, raindrops, the list is endless.
This is a well-known theme explored by macro photographers using a flash.
Longer shutter speeds tend to blur movement (unless the photographer follows the movement with the panning technique discussed before).
You can create the classic misting, flowing effect of waterfalls and other water streams.
Or, if you are a street photographer, you can also come up with other unexpected ideas.
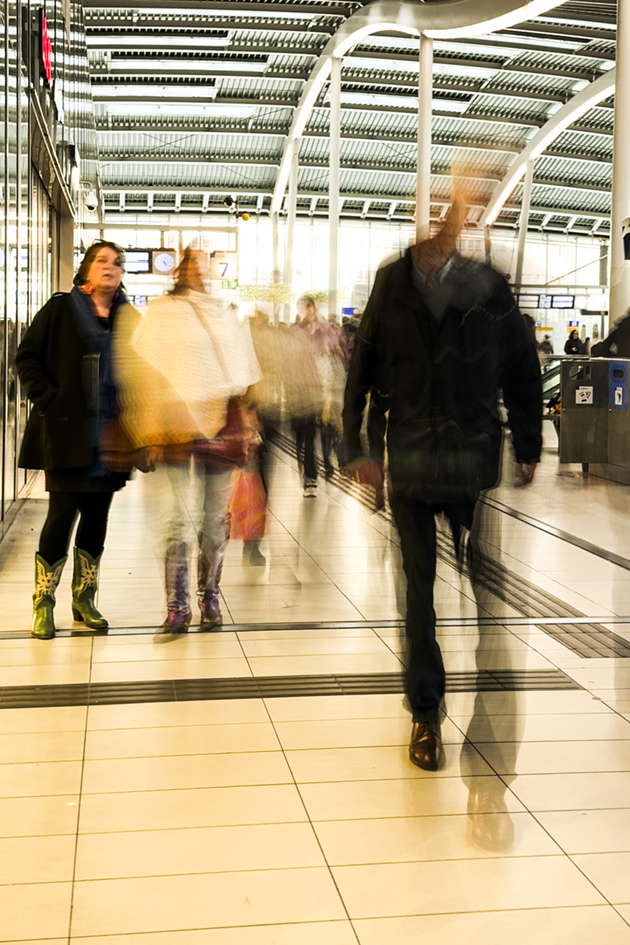
In the photograph below, I did not freeze the moment at all. If I had, I wouldn’t have had any story to tell.
My 1/8 sec combined with an f/16 and, again, the built-in ND filter got my man dissolved in a fountain in a modern neighborhood in Lisbon East.
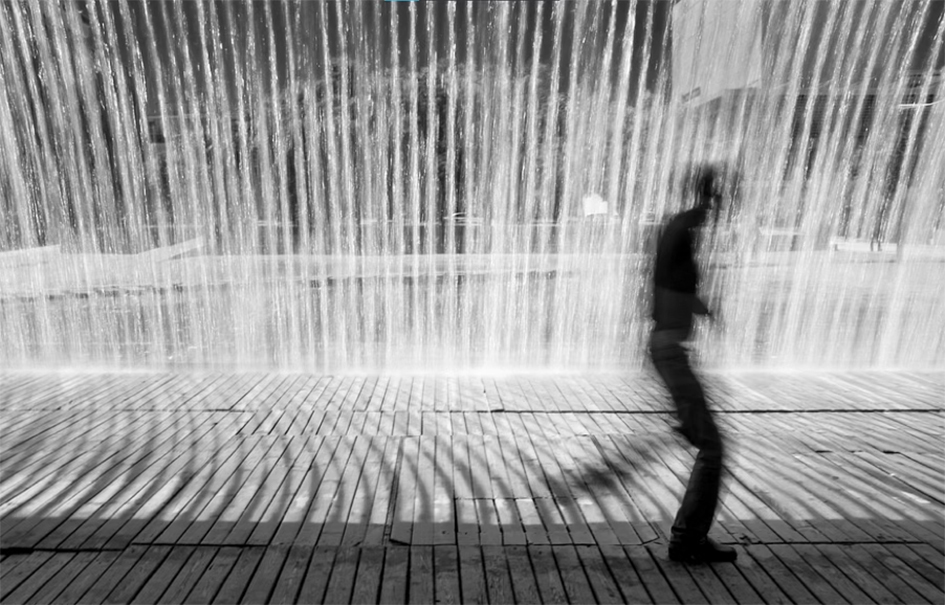
“Dissolution”, Lisbon (PT) — by Fernando Coelho
Embrace the Blur (or Sharper is Better)
What is sharpness?
In photography, sharpness is the quality of your photographs that renders a clear image of your subject(s).
The benefit of a sharp photo is that small details are more discernable, and the composition can be more attractive to look at.
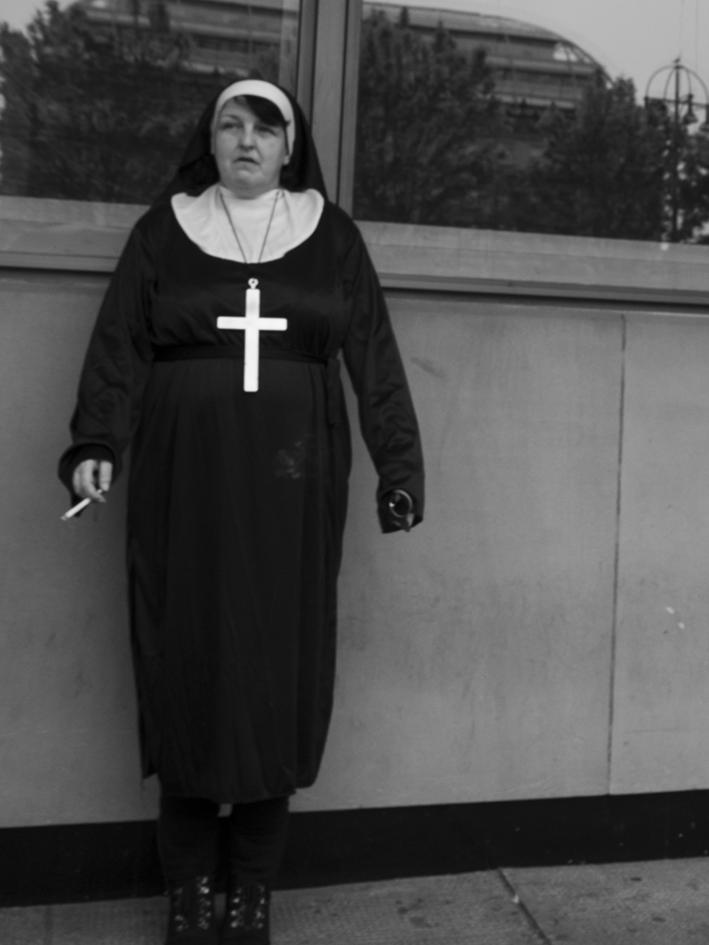
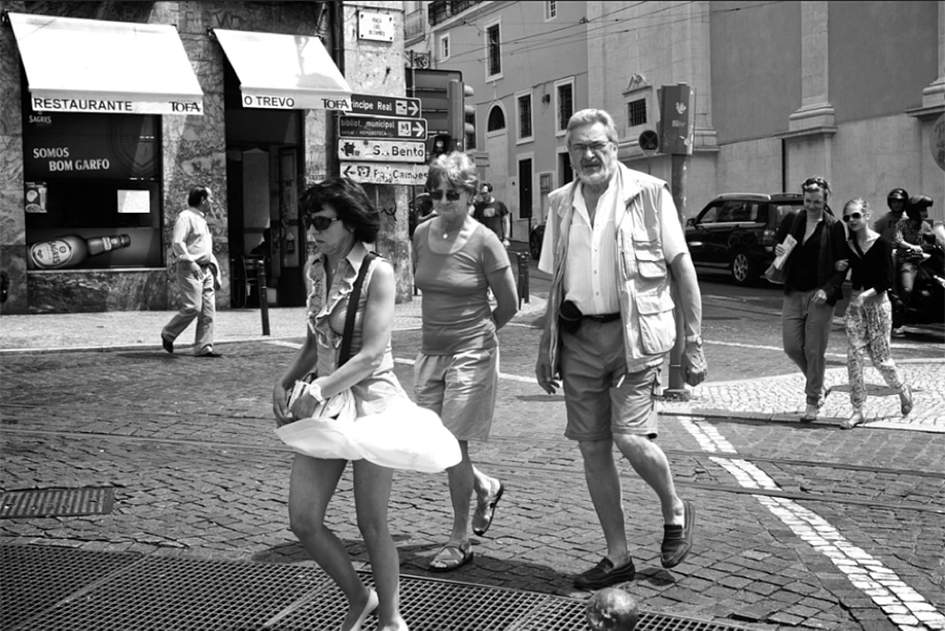
A self-explanatory example that asks you to be sharp about the sharpness in your frame is the eyes of your subjects. As it used to say, when you connect with someone’s eyes, you can look at someone’s inner being.
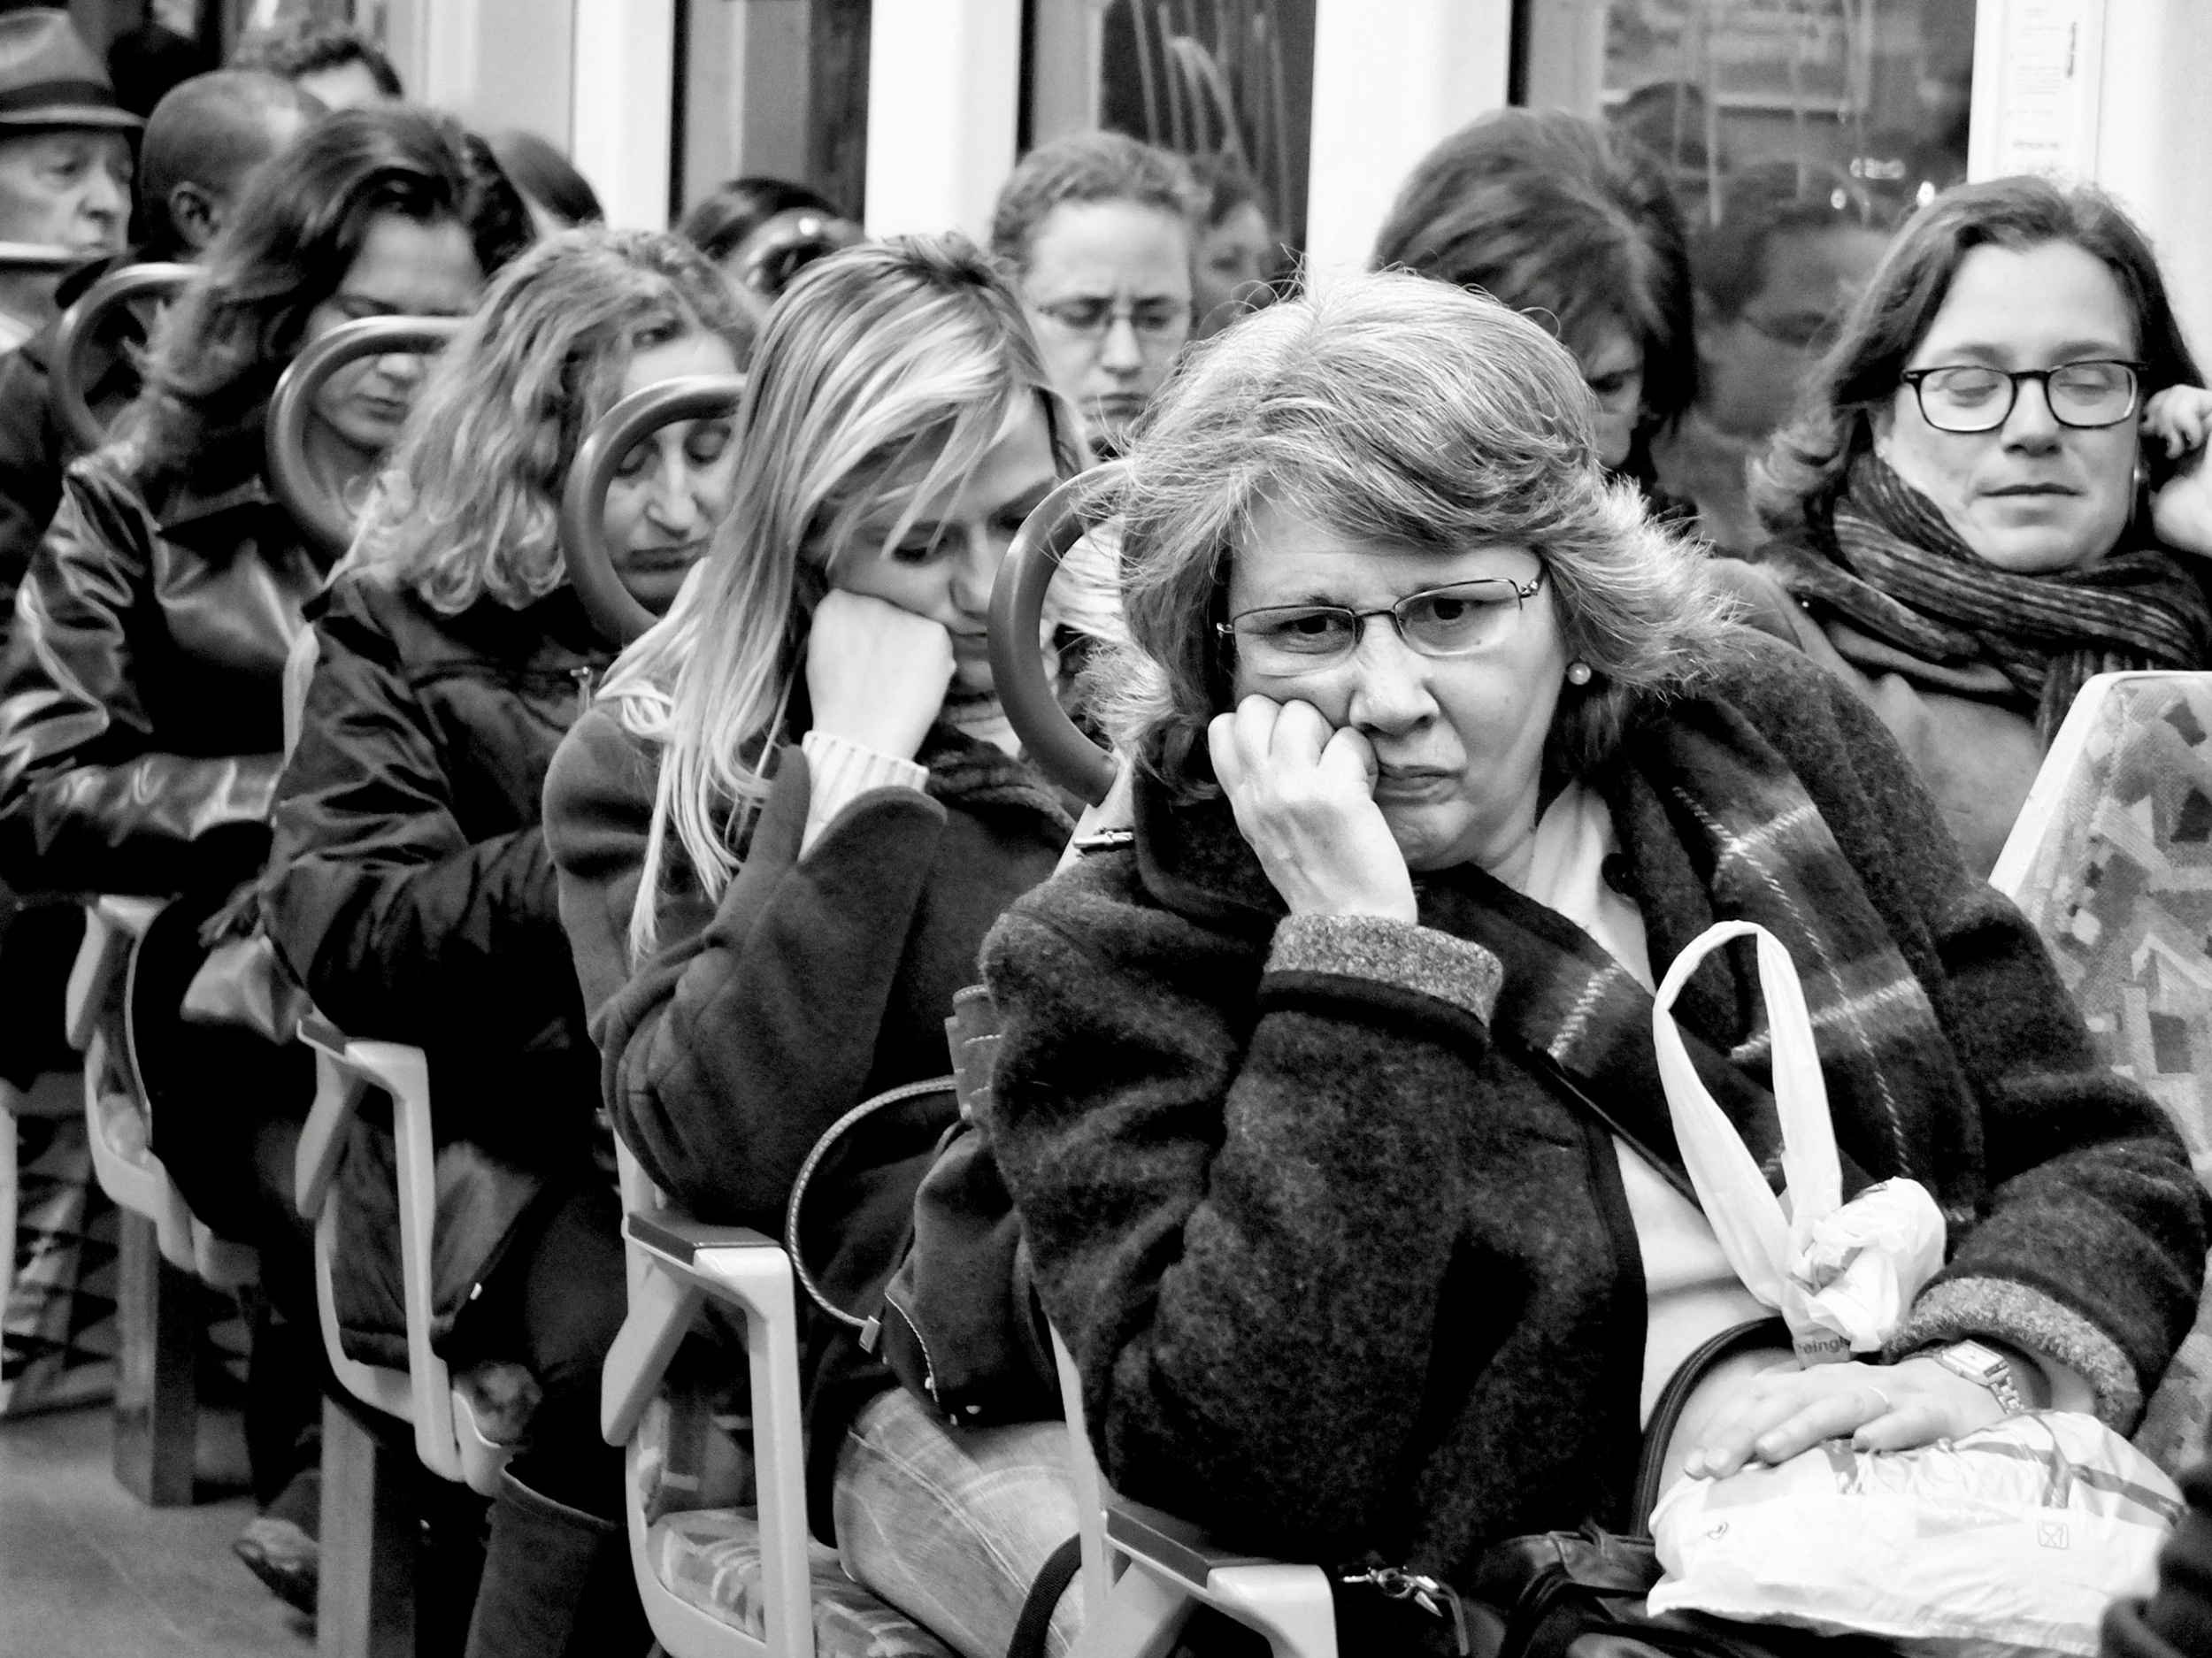
“Commuters”, Lisbon (PT) — by Fernando Coelho
As in the photograph above, the interplay between sharpness and a slightly blurred background helps the narrative.
However, there are other types of photographs where sharpness is not decisive.
This includes images where you are using blur to indicate motion or because you want to go more abstract, as in the examples in the beginning.
Remember that, regardless of the (lack of) sharpness you choose, you still want to draw the viewer’s eye toward the focal point. Leaving sharp elements in the frame can be essential to create the dynamics you pretend.
“Framed”, Rotterdam (NL) — by Fernando Coelho
Shoot Into the Sun (or Keep the Sun Behind)
The sun is the most potent and prevalent lighting source, so treat it with the respect it deserves.
Even on overcast days, it usually delivers plenty of light during the daytime.
Ambient light from the sun, regardless of where it is in the sky, is enough to fully illuminate almost any subject. It’s important to note what the sun does and where it is located in relation to the street elements in your scenes.
Depending on the time of day, the shadows on the street pavements and walls of buildings can become long and majestic. If you mix this with some creativity, things can get wild, and you can come up with unique compositions. I give examples and tips in this story.
Eventually, you will encounter situations where you can’t put the sun behind you and must find a way to expose your subjects pleasantly.
On the other hand, you may want to face the sun with courage. Expose the background and use silhouettes to give your photographs a dramatic and mysterious touch.
There are several reasons why you may want to shoot silhouettes.
When shooting against the sun, I keep the camera settings simple: spot-metering the background and exposing for the highlights.
Often, you need also to lock the exposure and reframe/focus before pressing the shutter release button.
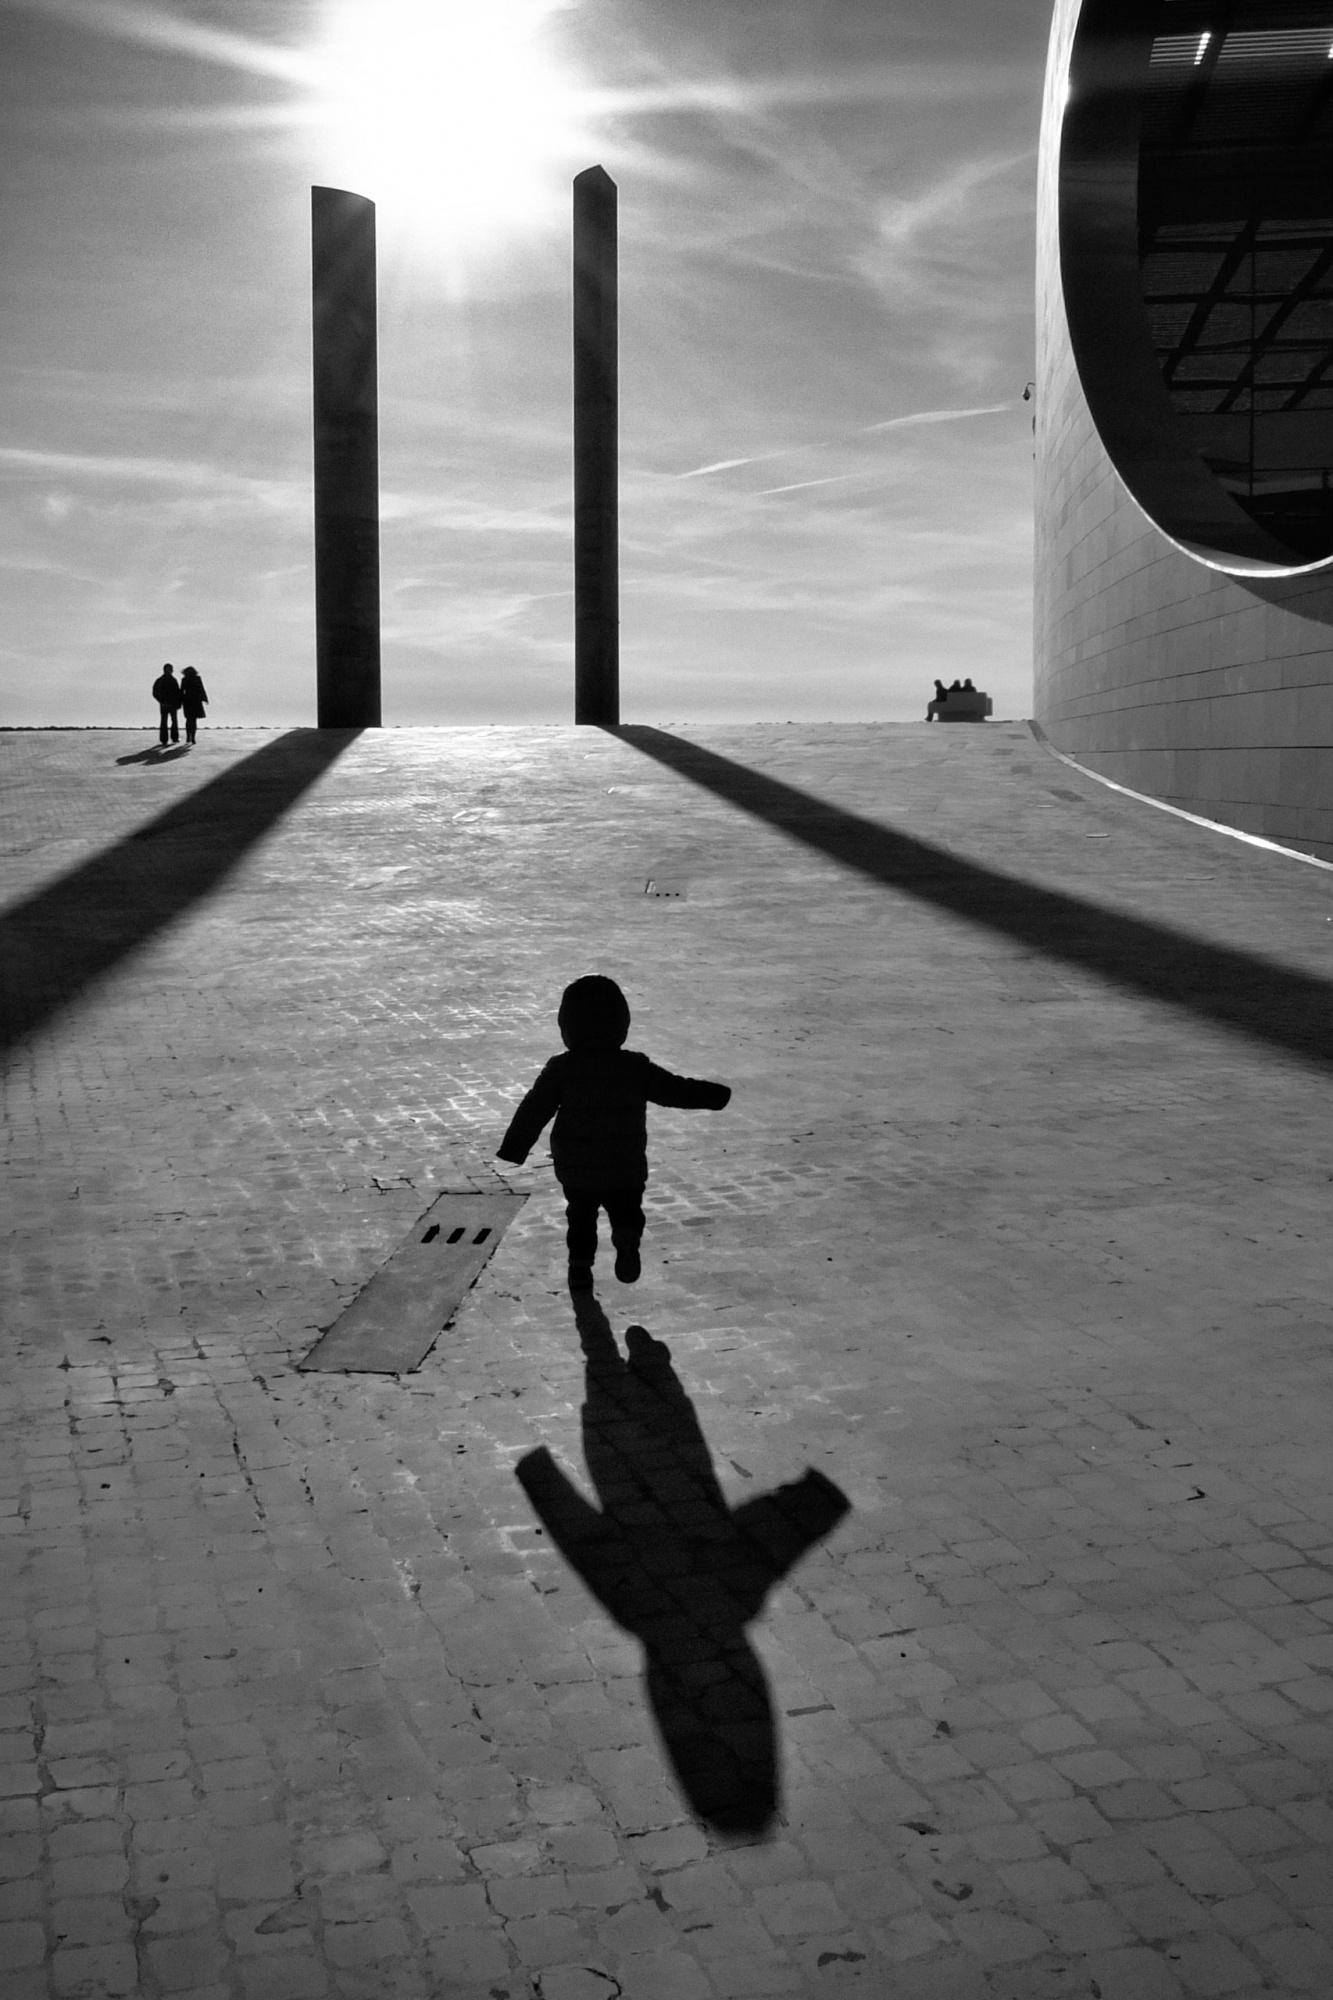
The photograph below and the one on top of this article were taken in one of my favorite places in Lisbon West: Champalimaud Centre for the Unknown (I have so many images in this place that I will write a story about one of these days).
The two colossal obelisks, which stand parallel to each other, radiate a sense of reverence and devotion. The blasting sun emphasizes this idea in both photographs.
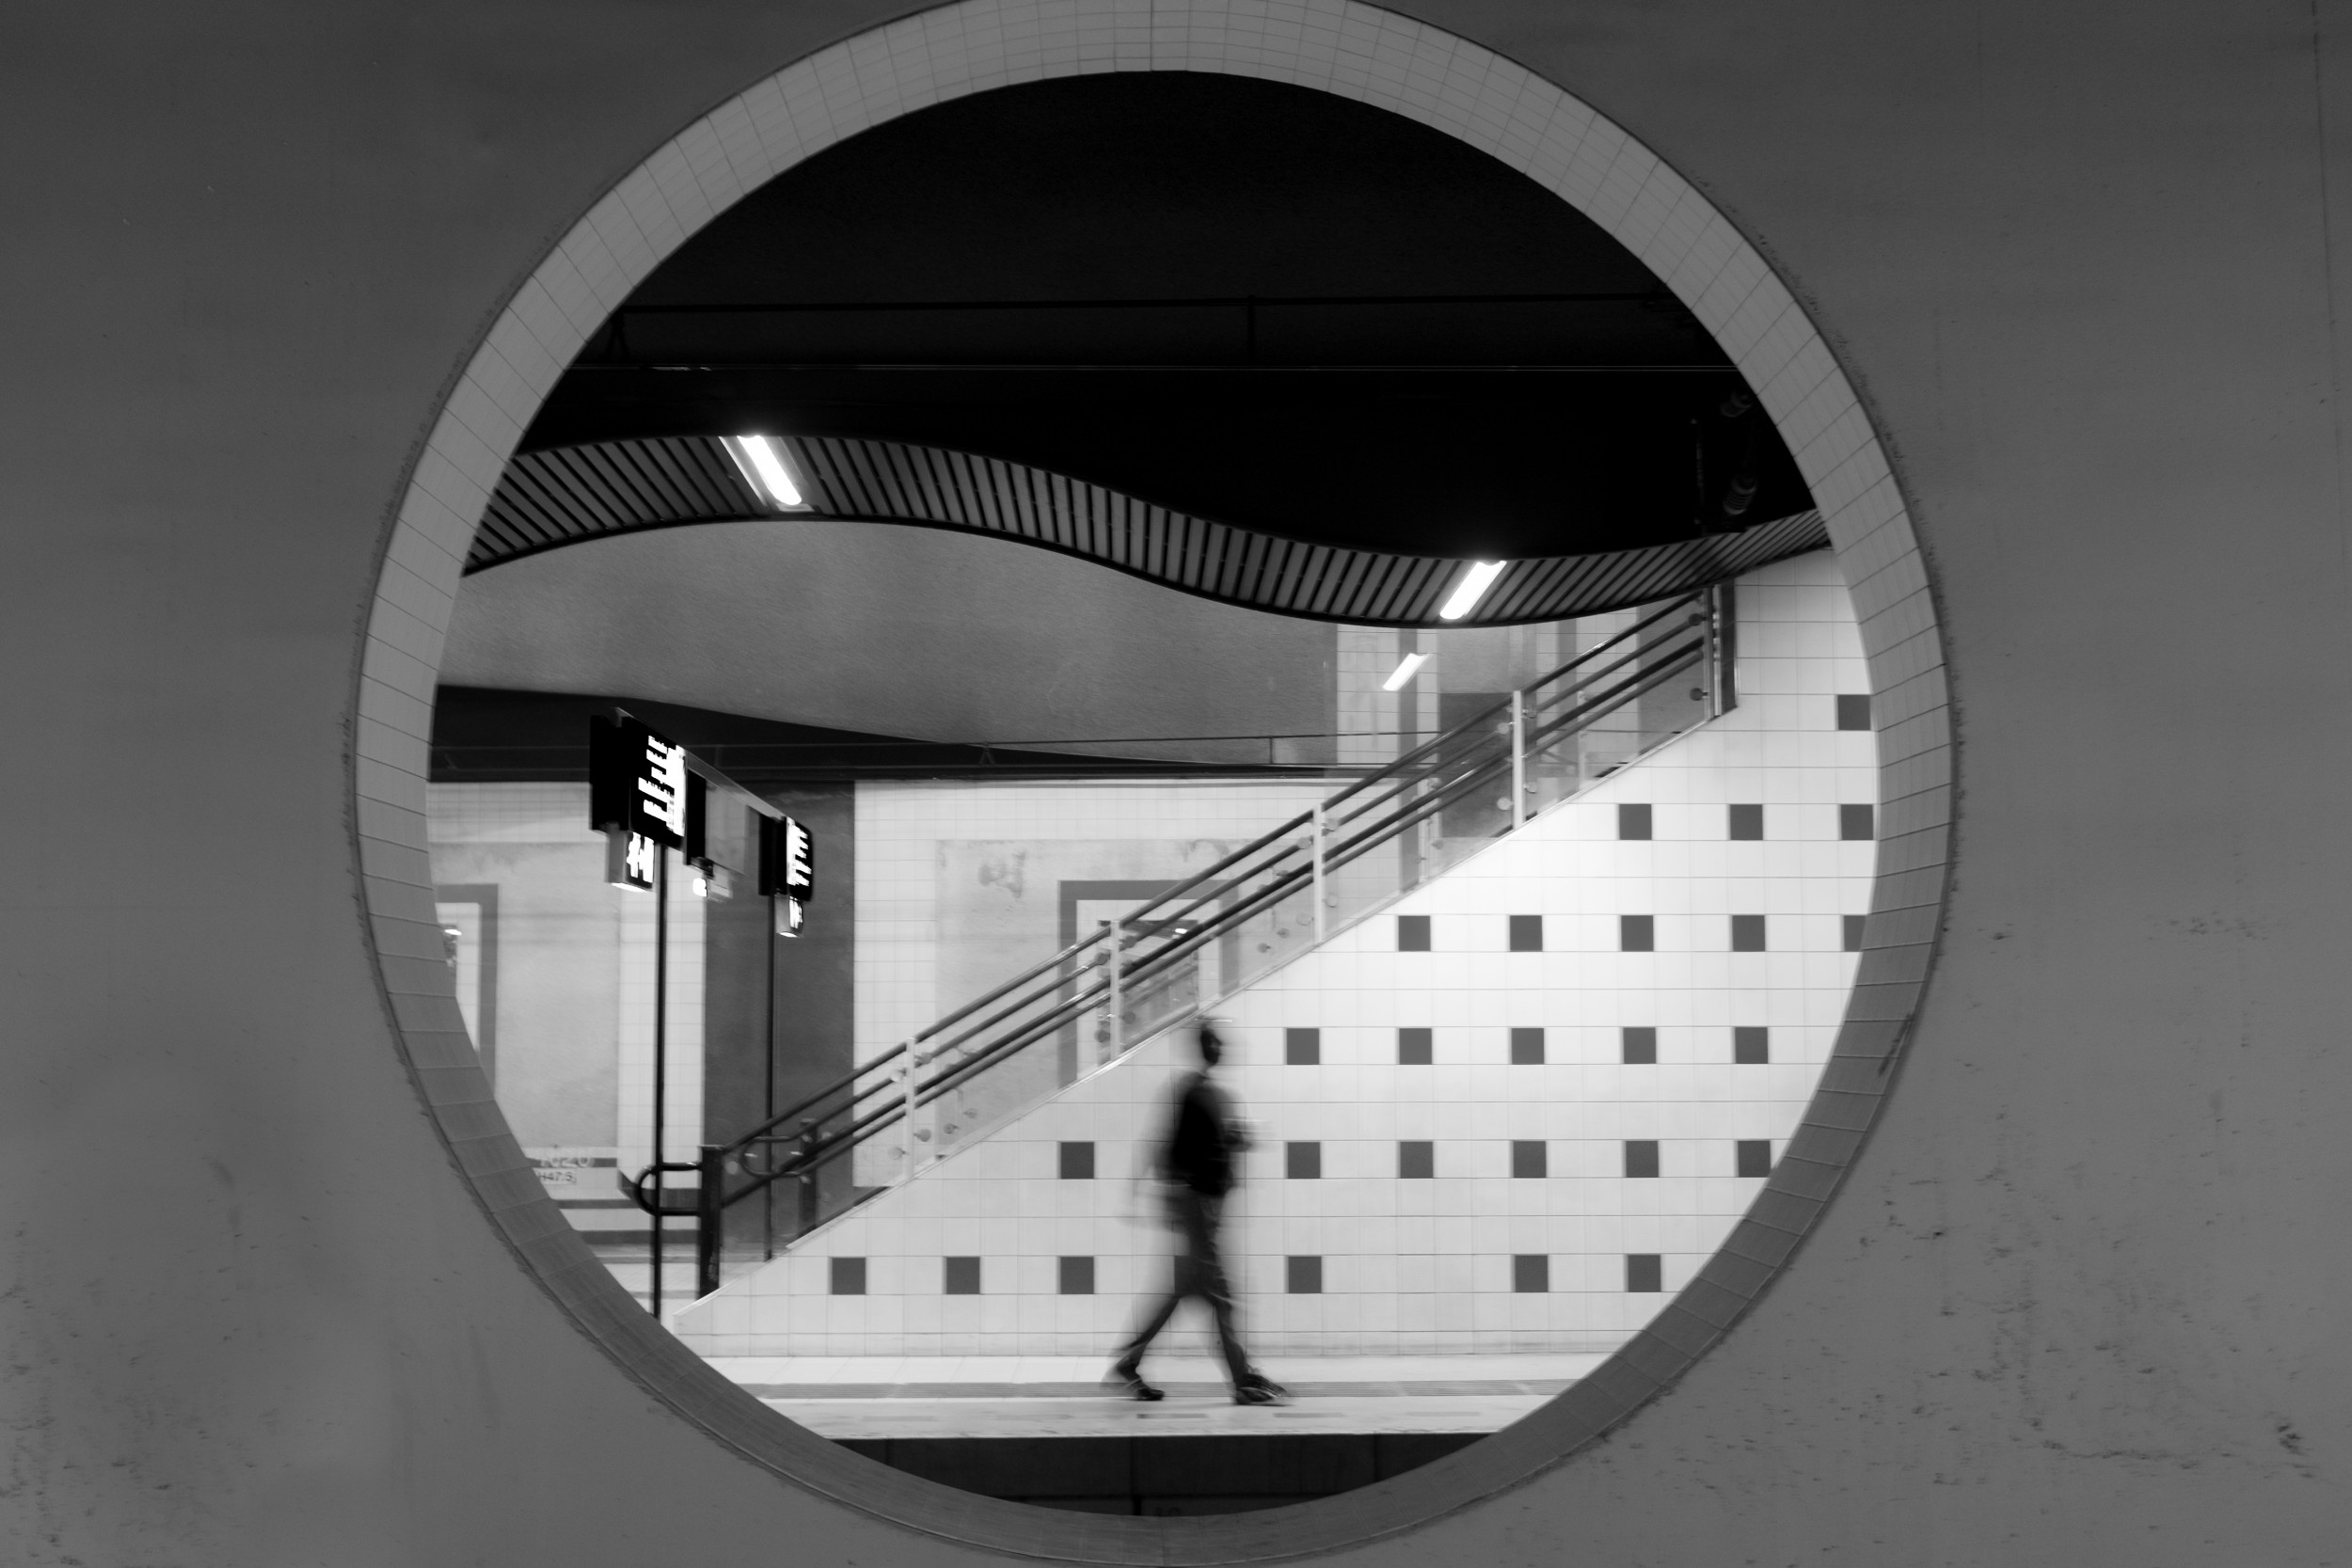
“Portal”, Lisbon (PT) — by Fernando Coelho
While mastering the technical aspects of photography is crucial, the exploration of unique concepts and styles truly sets artists apart.
 | Write |
 | Rolf Endermann PRO Thank you so much dear Yvette for your wonderful work for 1x |
 | Fernando Coelho CREW Thank you. Always a pleasure to photograph, to write about photography and to be seen and listened to. 1x is a wonderful community! |
 | Eiji Yamamoto PRO Dear Fernando, thank you so much for your wonderful article! This series expands the possibilities of photography. Dear Yvette, as always, thank you so much! |
 | Heike Willers PRO Thank you for this interesting article and for sharing your inspiring work, Fernando! And thank you, dear Yvette too. |
 | Yvette Depaepe CREW Thank you, Heike ! |
 | Elizabeth Allen CREW So many wonderful and creative images! Sincere thanks for this inspiring series, Fernando, that we can learn so much from. Thanks as always to Yvette. |
| Yvette Depaepe CREW Thanks, dear Elizabeth ... |